Apple Plum Pie

LRF+Pies+Skeiky-3.jpg

Apple-Plum Pie

By Kandis Smith at the LIttle Red Fox, from Edible DC Fall 2015

For the crust: 

  • 2¾ cups all-purpose flour

  • 1¼ teaspoons salt

  • 1 ¼ teaspoons sugar

  • 8 ounces butter, cold and cubed

  • ½ cup water (cold)

Put flour, salt and sugar in mixer with paddle attachment on low and add butter. Mix on medium-low until butter is incorporated. Drizzle with water and mix until dough comes together, but is still crumbly. 

Cut dough in half and form into 2 disks. Wrap in plastic and chill for at least 20 minutes. 

Roll out 1 disk to fit a 9-inch pie tin. Roll out the second disk and cut into shapes to decorate the top. 

For the filling: 

  • 4 apples, peeled, cored and sliced

  • 3 plums, sliced

  • 6 tablespoons butter

  • 2 tablespoons flour

  • ½ cup sugar

  • ½ cup brown sugar

  • ½ teaspoon cinnamon

  • ¼ cup water

Directions

Preheat oven to 350°F.

Melt butter in a small pot or saucepan, then whisk in flour.

Add both sugars, cinnamon and water and bring to a boil.

Cool slightly and mix with fruit. Add the filling to your prepared pie shell. 

Brush pie dough decorations with egg wash and place on top of the filling. 

Bake at 350° until bubbly and the crust is golden (about 45 minutes to an hour). Cool fully before slicing. 


Seasoned with Love: Nana's Apple Pancakes

By Elise Smith, Photography by Meghan McQuaid

Brown butter wasn’t the only key to Nana’s apple pancakes

Brown butter wasn’t the only key to Nana’s apple pancakes

My maternal grandmother, Winifred “Winnie” Morgan—my Nana—gave me one of my most precious gifts: my love of cooking. One of my earliest memories is coming down the stairs early in the morning and smelling the scent of browning butter. If you asked my Nana why she chose to use a brown butter technique, she would have answered, “Baby, that’s just how you got to do it. That’s how you get the flavors just right.” My Nana was never concerned with the specifics of culinary terminology. She was a self-taught cook and baker. Everything she learned was from trial and error.

Walking into the kitchen as a girl, I remember finding her drizzling the hot brown butter over sugared-and-spiced Granny Smith apples, the warm aroma of cinnamon, brown sugar and nutmeg hitting me instantly. My Nana told me to climb up onto the counter. She knew if she didn’t pick a special place for me—her partner, as she affectionately referred to me—I would follow her all around the kitchen, tight on her heels. 

Once the apples were complete, she tossed me a glance and said, “What do you smell?”

Eager to play the game, I excitedly said, “Butter. No, hot butter!”

She replied, “Good. What else?” 

“Apples and spices!” I shouted. (“Spices” was what I called cinnamon until I was about 6.)

“Excellent!” she said. “Now what do you see?”

I looked down and realized what lay ahead for the ingredients around me. “PANCAKES!” We’re making pancakes, Nana!”

The author Elise Smith with her Nana in the kitchen.

The author Elise Smith with her Nana in the kitchen.

And my very favorite pancakes were these, hot brown-buttered apple. She slid the bowl over in front of me and handed me her favorite wooden spoon. Her hazel eyes met my big brown ones and she gave me a wink, as if to say, “What are you waiting for, partner?” With that, I began to stir the mixture, going slow, remembering how I watched her do it. Mixing slowly and scraping the sides, making sure to leave some clumps, just like she always told me. Constantly looking up to watch her watching me, I was nervous. I wanted to do it just right. But in no time, the mixture came together into a proper batter, and I proclaimed, “Done!” She checked the batter, then gave me a grin, which everyone knew was her signature seal of approval.

After that, she added a pat of butter to the heated cast-iron skillet and scooped the batter in, letting each pancake cook just a moment before adding the apples to the middle. Three apple slices fanned out at the center—just to “show-off,” she would say. I watched her scoop and pour and flip with bated breath, delighted to see her in her element, knowing I would be eating a delicious breakfast soon. 

Now, more than 20 years later, when I think back on this memory I view everything in slow motion, as if the universe knew that one day I, too, would become a cook and would share my food with the world. My Nana had a way about her, something intangible, yet palpable when you were in her presence. She made everyone she interacted with feel special and wanted. If I forgot everything else about my Nana, I will never forget the way she made me feel and the love she planted in my heart for family and for cooking. Because cooking and feeding others are two of the purest and most endearing acts of love.


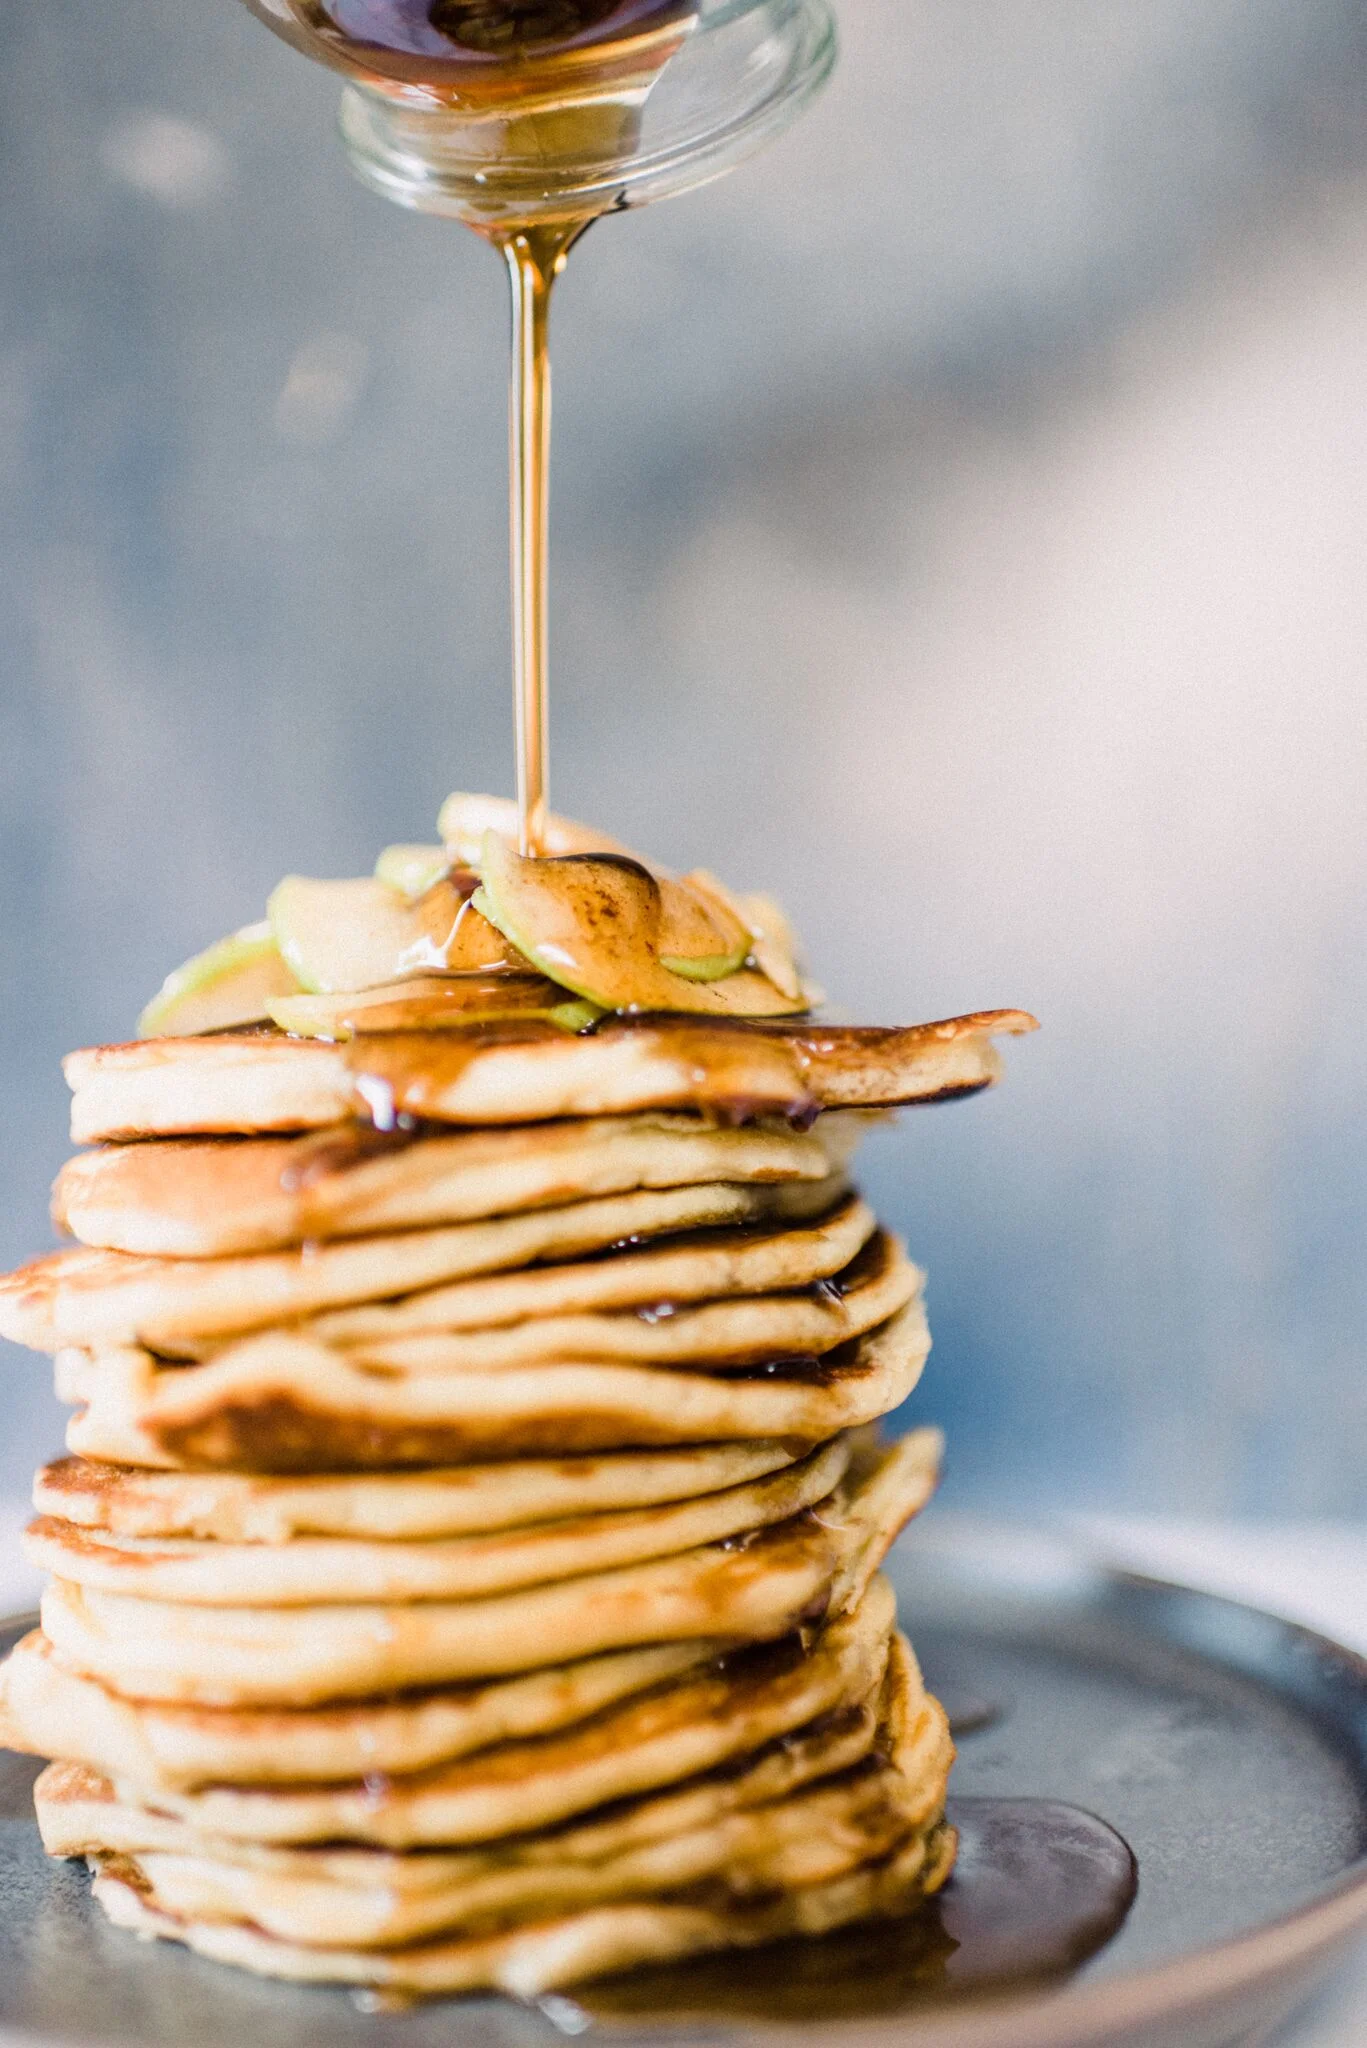
Maple syrup or honey pair perfectly with these apple pancakes.

Maple syrup or honey pair perfectly with these apple pancakes.

BROWN BUTTER APPLE PANCAKE

Brown Butter Apples

1 tablespoon light brown sugar

½ teaspoon cinnamon

⅛ teaspoon nutmeg 

2 Granny Smith apples

12 tablespoons unsalted butter


In a small bowl, whisk together the brown sugar, cinnamon and nutmeg. Mix until very little or no clumps remain from the brown sugar. Set aside.

Peel the apples, then core the apples, halve them and cut them in ⅛-inch-thick slices using a knife or mandoline. Toss the apples with sugar spice mixtures. Set aside.

In a small saucepan over low-medium heat, melt the butter. Cook for 6–7 minutes, stirring or swirling often, making sure the butter doesn’t burn. Once you smell a mild nuttiness and the butter becomes amber in appearance, quickly take it off the heat and place atop a wire rack to cool. Allow to cool for 5 minutes.

Pour 2 tablespoons of the brown butter atop the spiced apples and toss, using your hands to well coat each slice. Set aside.


Pancakes
(
Makes 16–20 pancakes, serves 4–6.)

2 cups all-purpose flour

3 tablespoons granulated sugar

2 teaspoons baking powder

1 teaspoon baking soda

1 teaspoon salt

Pinch of cinnamon

2 eggs, at room temperature

¼  cup whole milk

1 teaspoon vanilla extract

2 cups whole-fat buttermilk, at room temperature


In a large bowl, add the flour, sugar, baking powder and soda, salt and cinnamon. Whisk to combine and set aside.

In a small bowl, beat together the eggs, whole milk and vanilla extract. Once well incorporated, mix in the remaining cooled brown butter. Mix until evenly combined and smooth. 

Make a well in the center of the dry ingredient bowl, pouring in the egg mixture. Using a wooden spoon, stir in the buttermilk and mix until the wet and dry ingredients are well incorporated. The texture should be cohesive with some remaining clumps visible. 

Lightly butter a griddle heated to 375° or a seasoned cast-iron skillet, over medium-high heat (check by flicking a little water into the pan; if it pops and dances—it’s ready). Scoop about ⅓ cup of batter for each pancake. Cook until the edges just start to solidify. Then, add 3 slices of the spiced apples to the center of each pancake and cook a moment longer, until bubbles begin to appear, and then flip.

Serve hot with maple syrup—or, how my Nana and I enjoyed them, with a little honey. Enjoy!

Flaky Fall Hand Pies

By Susan Lutz, Photography by Jai Williams

“Defined loosely, a hand pie is a circle of dough stuffed with a sweet or savory filling, folded into a half-moon shape, and crimped along the edges,” Susan Lutz writes.

“Defined loosely, a hand pie is a circle of dough stuffed with a sweet or savory filling, folded into a half-moon shape, and crimped along the edges,” Susan Lutz writes.

Long before the introduction of fast-casual, hand pies were one of the world’s first and best “to go” foods. Defined loosely, a hand pie is a circle of dough stuffed with a sweet or savory filling, folded into a half-moon shape, and crimped along the edges.

This meal-in-the-hand is called by many names around the globe—empanada, samosa, calzone and Cornish pasty, to name just a few. Unlike boiled or steamed dumplings, which are eaten with utensils from a plate or bowl, hand pies require nothing more than a single hand to get them from lunchbox to mouth.

Savory hand pies have traditionally provided a quick, satisfying lunch for fishermen, farmers and other workers too busy—or too far away—to return home for a midday meal. The Cornish pasty (pronounced PASS-tea) is a meat- and vegetable-filled pie that originated in England as early as the 14th century. By the mid-1800s it was the food of Cornish tin miners.

The miners’ wives prepared the pies at home, carving a letter or picture into the top of the crust or marking it with a monogram made of dough. They took the homemade pasties to their local baker, who put them in the oven with his bread first thing in the morning for the miners to pick up on their way to work.

When lunchtime rolled around, they re-heated their doughy meals on steam-powered mining machinery deep underground. According to Michael Burgess, owner of The Pure Pasty Co. in Vienna, VA, the dough of the miners’ pasties was made for strength, not flakiness, as an unusual but vital food safety device. The crust of the pasty, known as the “crimp,” was made sturdy enough so that the miners could eat the heavily stuffed pasty by holding only the crimp, which was never eaten.

A food that once served an intensely functional purpose—providing safe nutrition for tin miners—is now adapted to fit all tastes and lifestyles.

A food that once served an intensely functional purpose—providing safe nutrition for tin miners—is now adapted to fit all tastes and lifestyles.

The experienced miners told the younger ones that they must always throw the crimp on the ground for the fairies who lived in the mines—or terrible things would happen. And the truth was, terrible things would happen if they ate the crimp. The miners’ hands were covered with arsenic-laced dust from work in the mines with no way to wash them, so the pasty’s crimp became a disposable handle for conveying a less-toxic lunch. When the men emerged from the mines at the end of the day, they saw that the crimps they’d left were always gone. Whether the crimp went to the fairies or to the rats living deep underground, it was a safe bet to toss them.

Although most of us contend with neither rats nor fairies as we pack our lunches, hand pies still make for satisfying self-contained lunches. My garden has been producing enormous amounts of kale and Calabrian peppers this year, so I came up with a way to transform my favorite spicy kale and potato side dish into a hand pie using frozen puff pastry. It’s a bit flakier than the rough puff pastry favored by Michael Burgess, but delicious and sturdy enough to survive a trip in a lunch box. These hand pies can also be frozen after baking for a quick last-minute meal.

Because my kids love a sweet treat for snacks or “lunch-dessert,” as they like to call it, I made a variety of sweet hand pies using both leftover puff pastry and the pie dough recipe my mom taught me to make many years ago. My oldest daughter’s tastes are simple, so for her I stuffed leftover bits of puff pastry with chocolate chunks and baked them alongside the savory pies—no recipe required! The younger one requested pumpkin pie topped with cinnamon sugar. I added dulce de leche and five spice powder to this version that has quickly become a family favorite. (My father ate four leftover pumpkin hand pies straight from the refrigerator and called it lunch.)

Sweet or savory, using homemade pastry or a pre-packaged dough, hand pies are versatile enough to satisfy almost any appetite. And there’s rarely any crust left over for the fairies.

Lutz carefully rolls out her pastry dough.

Lutz carefully rolls out her pastry dough.

Potato-Kale Hand Pies

This recipe will make 16 hand pies or 8 pies with enough filling leftover for a side dish for 4, which is what we usually do. Filling recipe can also be halved to make 8 pies with no leftovers. In this case, you will only need 1 package of puff pastry.

Ingredients:

2 large red potatoes (about 1½ pounds), peeled and diced

2 tablespoons good olive oil, plus an additional 2 tablespoons for finishing

1 medium onion, peeled and diced

2 packages puff pastry (4 sheets) for 16 hand pies

½ pound kale (6 to 8 stems, depending on size)

1 tablespoon freshly squeezed lemon juice

½ cup crumbled feta cheese

½ teaspoon salt, or to taste

½ teaspoon black pepper

½ to 1 teaspoon dried hot pepper flakes or ½ fresh Calabrian pepper, seeded and julienned

1 egg, beaten

1 tablespoon water


Special Tools:

Martini glass, biscuit cutter or bowl with 4½- to 5-inch diameter

Parchment paper

NOTE: If cooking for kids or friends who prefer less spice, omit red pepper flakes when making filling and sprinkle a few flakes onto each individual pie before sealing it up. You can use the extra dough to create letters—indicating the ingredients or the recipient’s initial—that can be “glued” onto the top with egg wash.

Directions:

Place diced potatoes in a medium saucepan and cover potatoes with water. Bring to a boil, then reduce heat to medium. Partially cover pan and simmer until potatoes are fork-tender, about 10 minutes.

While potatoes cook, add 2 tablespoons of olive oil to a heated cast-iron or non-stick frying pan. When oil is hot, add chopped onions and cook over medium-low heat for 15 to 20 minutes, until lightly browned.

Remove puff pastry dough from freezer and set on counter to defrost, following package directions.

Wash kale and remove stems. Slice kale leaves into ¼-inch ribbons, then chop in opposite direction to form thin slices no more than 2 inches long.

When potatoes are tender, add kale to pot with potatoes. Bring to a boil, then reduce to medium heat for 5 minutes, stirring occasionally.

Drain potato and kale mixture in a colander and return to pan. Use a wooden spoon or spatula to crush potato cubes until they are broken up, but not mashed.

Add remaining browned onions, 2 tablespoons of olive oil, lemon juice, crumbled feta cheese, salt, pepper, and red pepper flakes (if desired.) You may choose to add a sprinkling of red pepper flakes to each individual pie when you fill it if you want some spicy and some not-so-spicy pies.

While filling cools, preheat oven to 400°F.

Beat an egg in a small bowl with 1 tablespoon of room-temperature water.

Line a 9- by 13-inch baking sheet with parchment paper.

A sharp knife and a martini glass/copper canning funnel helps make the perfect circular cut.

A sharp knife and a martini glass/copper canning funnel helps make the perfect circular cut.

Unfold 1 sheet of puff pastry dough and lay on a slightly floured surface. Place martini glass or bowl upside down on one corner of the dough to create a guide for cutting out circles. Use a sharp knife to trace around the edge of the martini glass or bowl. You should be able to get 4 circles out of each sheet of pastry dough.

Add 2 rounded tablespoons of cooled filling to the center of the circle of dough.

Set the filled pastry round onto baking sheet covered with parchment paper and brush a bit of the egg wash onto the edges of the pastry circle. This egg wash is the “glue” that helps your dough stick together.

Fold the circle of dough over your filling to create a half-moon shape. To get the true look of a pasty, you’ll want to crimp the edges by pushing down one edge of the dough with your left thumb and then twisting the next section over top of the part you flattened with your right hand. Continue pushing and twisting all the way around the unsealed edges. Tuck the final bit of dough underneath and set on baking sheet. Repeat the process until you have 16 filled hand pies.

Crimping is essential for producing that iconic wavy edge.

Crimping is essential for producing that iconic wavy edge.

Be sure to save small leftover pieces of dough. You can use those to cut out decorations for your pies. I made some pies with red pepper flakes and some without, so I cut out the letter “S” for the spicy pies. You could also add the initials of your family members or friends, or designate food allergens.

If adding letters or pictures cut out of dough, glue them on top of your pies with egg wash, then lightly brush the top of each moon-shaped pie with egg wash to help them brown beautifully.

Place baking sheet of pies in preheated oven for 18 to 20 minutes. The tops of the pies should be lightly browned.

Let cool for 10 minutes before serving. Hand pies may be eaten warm or at room temperature.

Refrigerate or freeze leftover pies. Refrigerated pies can be reheated by microwaving on full power for 30 seconds and then placed in a 400°F oven for 5 minutes for a flaky crust. Frozen pies should be microwaved on full power for 60 seconds and then baked for 5 minutes. Internal temperature should be 165° F.

The delicious result: warm potato-kale hand pies!

The delicious result: warm potato-kale hand pies!


Pumpkin Hand Pies 

This recipe makes 16 to 18 hand pies using the homemade pie dough included in the recipe, but you can easily substitute pre-made pie dough if you want to speed up the process.

Ingredients:

3 cups, plus an additional 3 to 4 tablespoons all-purpose flour

1 teaspoon salt, plus an additional pinch

1 cup vegetable shortening or lard

3 eggs (1 for crust, 1 for pumpkin filling and a third for egg wash)

⅓ cup plus 1 tablespoon cold water

1 tablespoon white vinegar

1 canned puréed pumpkin

¼ cup brown sugar

1 tablespoon dulce de leche (bottled or canned versions are fine) or heavy cream

½ teaspoon five spice powder

1 tablespoon water

1 tablespoon sugar (sanding or granulated)

1 teaspoon ground cinnamon


Directions:

Place 3 cups flour and 1 teaspoon salt into a large bowl.

Measure 1 cup of vegetable shortening and add to flour mixture in small pieces. Using a fork or pastry blender, cut the shortening into the flour mixture until the flour-covered shortening balls are the size of slightly flattened peas.

Beat 1 egg in a small bowl. Add water and vinegar to beaten egg and stir to combine.

Slowly pour liquid into flour mixture, stirring gently with 2 fingers until all liquid is added. Have a light touch with dough to keep it flaky. Stir no more than is necessary to work dough into a ball.

Divide dough in half and shape into 2 rounds, flattening slightly to make it easier to roll out later. Wrap dough in plastic wrap and refrigerate until ready to use. Dough can be made up to 24 hours in advance.

When ready to bake hand pies, preheat oven to 400°F and take dough out of refrigerator.

Place puréed pumpkin, brown sugar, dulce de leche or heavy cream, five spice powder, the second egg and a pinch of salt into a medium bowl and stir until mixed.

In a separate small bowl, mix together sugar and cinnamon for topping pies.

Beat third egg in a small bowl and add 1 tablespoon water.

Working with 1 round at a time, roll pie dough out on flour-covered pastry cloth or countertop.

Continue rolling dough until it’s no more than ¼ inch thick, but a generous ⅛ inch thick is even better.

Using a 5-inch diameter cutter (I use the bottom of a canning funnel) cut out circles of dough and place on a parchment-covered baking sheet. After cutting out all the circles you can, gently gather leftovers into a ball and re-roll dough to make a few additional circles. You can re-roll dough only once. After that, it becomes too crumbly.

The egg wash acts as a “glue” to help seal the dough of the hand pie.

The egg wash acts as a “glue” to help seal the dough of the hand pie.

Fill 1 circle of dough with a tablespoon of filling and brush a bit of egg wash on the outer edges to help seal the dough. Pinch edges together to form a half-moon shape. Don’t worry if a bit of filling spills out. I do the pinching over the bowl of pumpkin filling so any excess will go right back into the bowl. Repeat with remaining circles of dough.

Set filled hand pie back on baking sheet. Repeat filling process with remaining circles of dough.

Brush a bit of egg wash onto tops of each pie and sprinkle with cinnamon-sugar mixture.

Bake pies at 400° for 15 to 20 minutes, or until golden brown. Repeat process with second batch of refrigerated dough while the first batch bakes.

Let hand pies cool before serving. Refrigerate any leftover pies.